How to Hitch a Trailer: A Step-by-Step Guide
Jul 17, 2023

MP01
M1
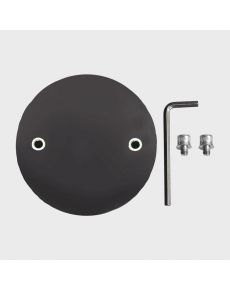
Magnet Mount for Haloview Rear View Camera Model
CA108
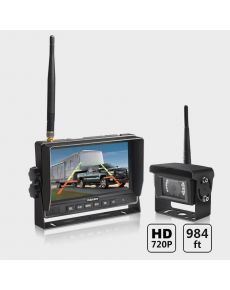
Haloview MC7108 7 Inch 720P HD Digital Wireless Backup Camera System
UB001
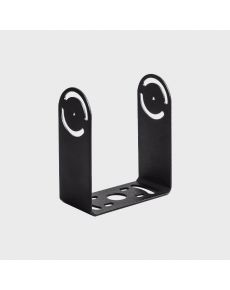
Haloview New Version U-Support Bracket for Camera
Looking for a way to install a backup camera yourself without difficulty? You’ve come to the right place. This guide will walk you through installing a backup camera with no drilling.
Before we begin to install our 720P HD wireless backup camera CA108, we’ll need to gather a few tools.
You'll need the following tools to install it:
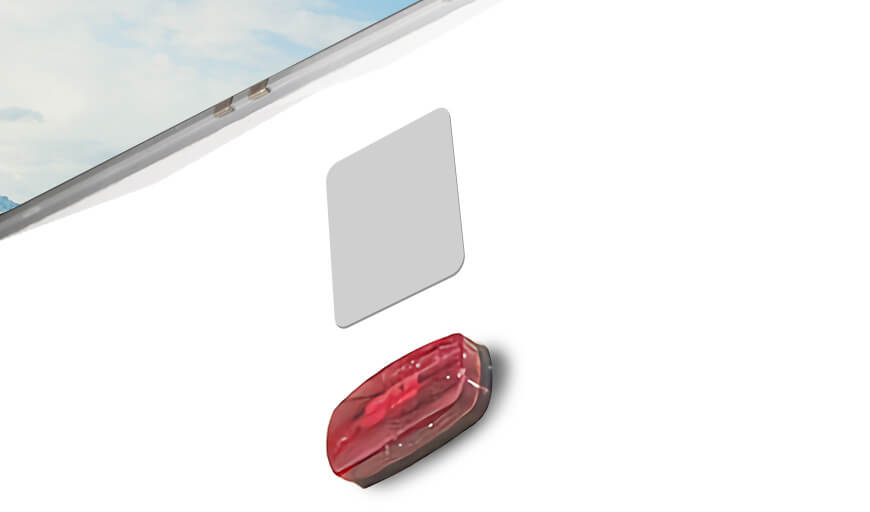
Metal Plate with 3M tape, sku: MP01
Magnetic mount, sku: M1
New version U-support bracket, sku: UB001
MC7108 wireless backup camera, sku: CA108
Screwdriver
Wire Pliers
Electrical Tape
Silicone sealant
The MC7108 camera should be centered on the back of your RV, make sure you have found the perfect spot and get it cleaned before you stick the metal plate in place. We recommend stick the metal plate at the top of the center running light as it ensures the monitor a better signal reception.
The antenna will limit the camera's angle of rotation, please replace the bracket of the MC7108 camera with the new version bracket UB001. Install the magnetic mount on the bracket and stick it on the metal plate.
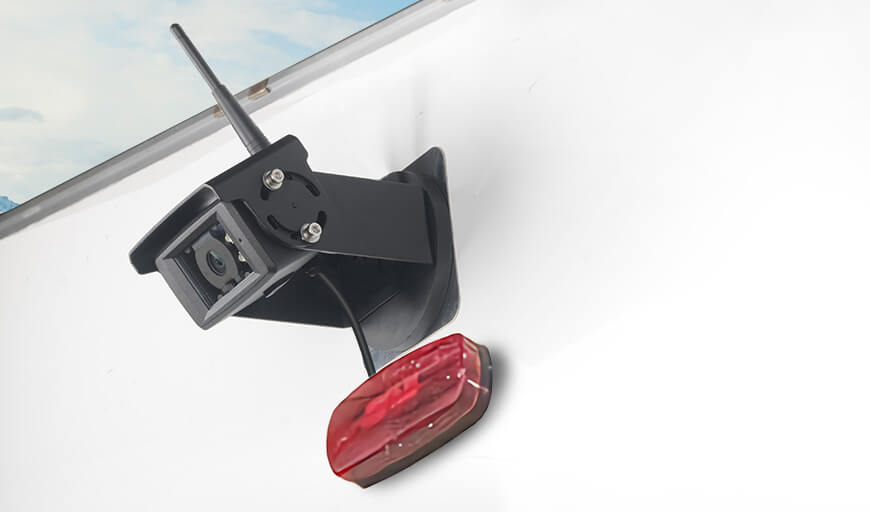
Remove the running light cover of your fiberglass RV with the screwdriver. Using the wire pliers, cut the camera DC power cable to a length that you needed and peel back the rubber covering the end of it.
Then, attach the positive bare wire cables to the running light cord’s power connector, attach the negative bare wire cables to the running light cord’s GND connector and wrap the combined wires in electrical tape. For safety, make sure you do this while the car is turned off.
Reinstall the running light cover, add silicone sealant around the edge of running light cover to prevent water, turn on your towing vehicle and test the camera.
We would like to thank you for reading this article.
Comment (1)
Marta K -
Monday, November 23, 2020
I’m researching the possibility of using my USB port instead of the cigarette lighter to power my monitor. Is these an optional connection available?
Load More Comment...

Lastest Posts
-
-
Top 15 Backup Camera Mounts And Brackets May 30, 2022
-
Car Blind Spot - Everything You Need to Know Mar 11, 2022
-
Aftermarket Blind Spot Monitor Jan 4, 2022
Categories