How to Hitch a Trailer: A Step-by-Step Guide
Jul 17, 2023
Writen by Loveyourrv
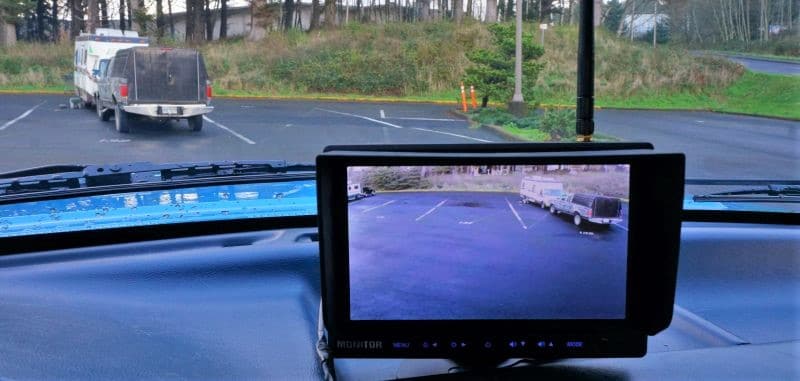
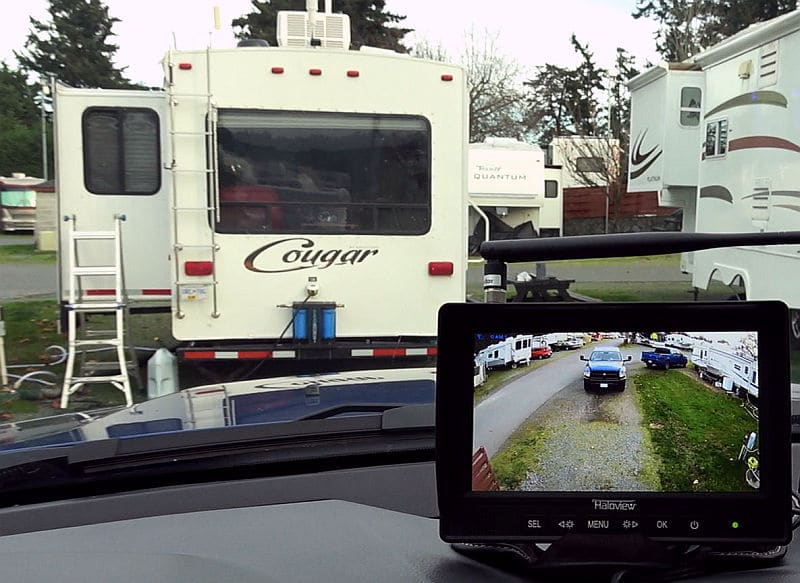
Two years ago I installed a Tadibrothers wireless RV backup camera system. I found the backup camera remarkably useful, but not so much as a backup camera. I found the killer application for it was as a rearview camera. I love having a clear view of exactly what’s behind me when towing the rig down a busy highway.
I’ve been mostly pleased with the backup camera system. However, I wasn’t overly thrilled with the picture quality. It was just OK resolution and I found the color saturation to be weak and the picture a little washed out.
So, when a company called Haloview approached me recently offering a free sample of their new model MC7108 wireless backup camera kit for review I decided to take them up on their offer. The timing was perfect since we just purchase our new Ram 3500 truck and needed to install the RV backup camera display.
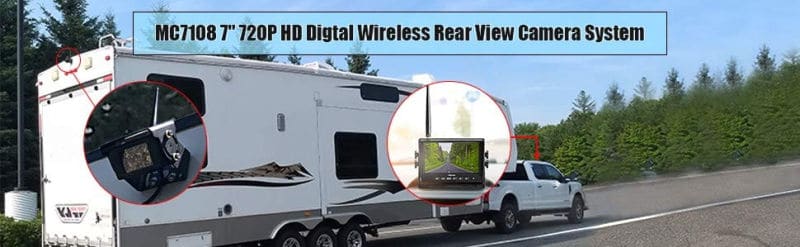
The Haloview MC7108 claims excellent 720P resolution on an IPS display plus DVR capability! Having a video recording of what is going on behind me could prove useful in an accident. Along with my Garmin Dashcam, this would give me hours of archived video footage from both the front and back of the rig.
Video Detailing My Haloview Wireless Backup Camera Installation
What’s in the Box?
The Model MC7108 Haloview wireless backup camera kit came with the following:
- 7″ Wireless Digital Monitor
- Wireless Waterproof Camera IP69K rating
- U-Support Bracket
- Sun Shield
- Angle Adjustment Screws
- Center Mount Bracket
- BMW Connector Adapter
- Car Cigarette Lighter Power Adapter
- Trigger Wires
- Camera Conversion Cable
- User Manual
Installing the Outside Camera
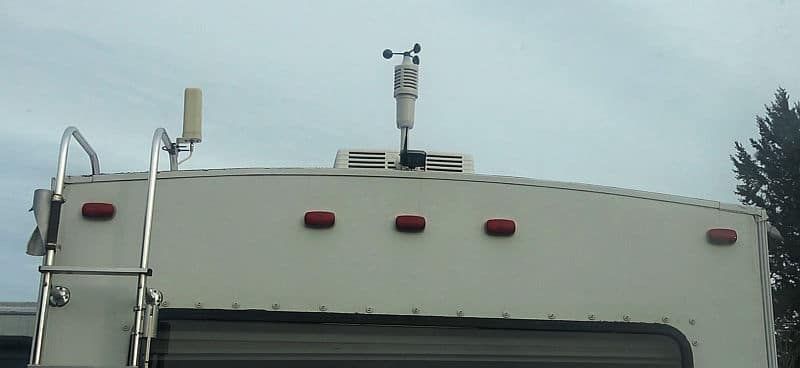
I decided to mount the camera in the exact same location as the previous one. The camera is mounted at the far rear of the RV roof pointed slightly down to get a broad view behind the RV. The camera is powered by 12 volts DC. It was a pretty easy install for me because I was able to utilize the same power source I had wired in for the previous camera.
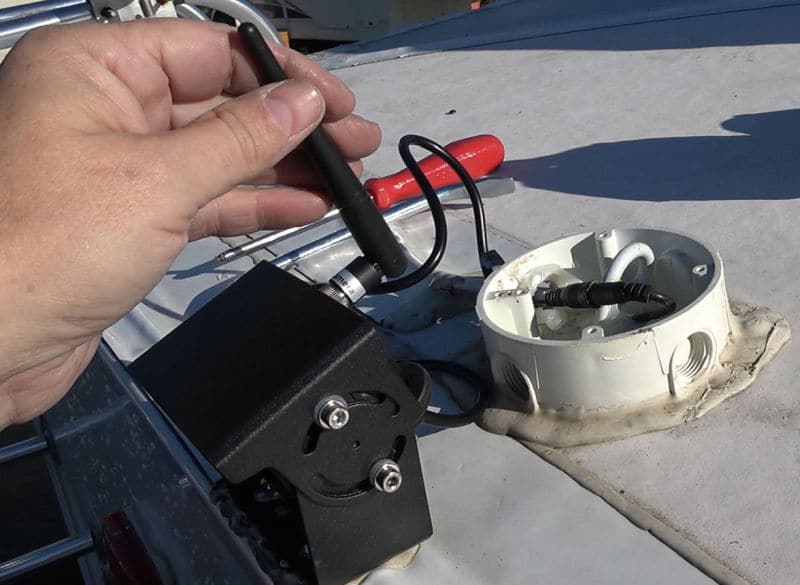
I also used the same rooftop junction box and mounting screws. The main concern was to get the positive/negative polarity right then reseal everything again with a healthy dose of Dicor self-leveling lap sealant. (See previous back up camera install)
Installing the Wireless Camera Display
I decided to use the provided 12-volt cigarette style adapter to power the display. It would make the installation super simple and allow me to easily remove it when not towing the rig. For mounting, I modded a bean bag dash mount I had previously used for my Garmon GPS.
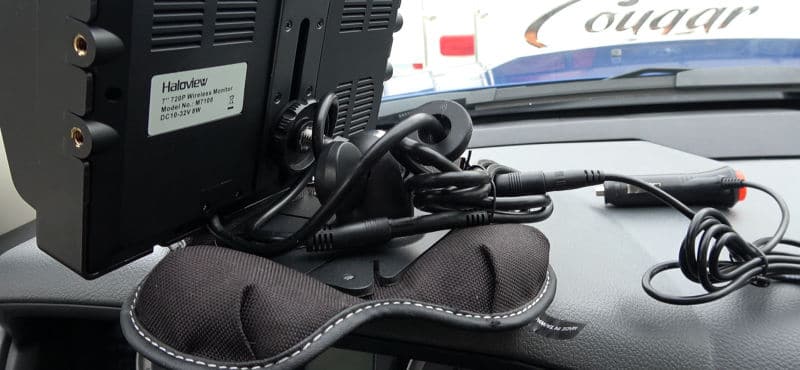
I removed the Garmin ball mount from the beanbag, and the stuck on the Haloview’s adjustable display mount using its 3M tape backing. It worked out well and allows for easy removal when not towing the trailer.
The final step was to pair the display with the camera. It’s done by selecting the pairing screen in the display menu then pushing a small button on the camera. It worked quickly and after paired they promptly found each other on subsequent power-ups.
Antenna Orientation and Distance
The Haloview MC7108 boasts a 984-foot wireless range using a 2.4Ghz signal. However, anything that blocks the signal reduces the range so the manual says best to mount the camera as high on the RV roof as possible. Also, both antennas should be perpendicular to the ground for best signal strength.
Adding a Micro SD Card
To make the recording of video footage possible I had to go out and purchase my own micro SD flash memory card. You can use a card with storage up to 128 GB. I bought an inexpensive 16 gig card and should get 18 hours of record time according to the table in the manual.
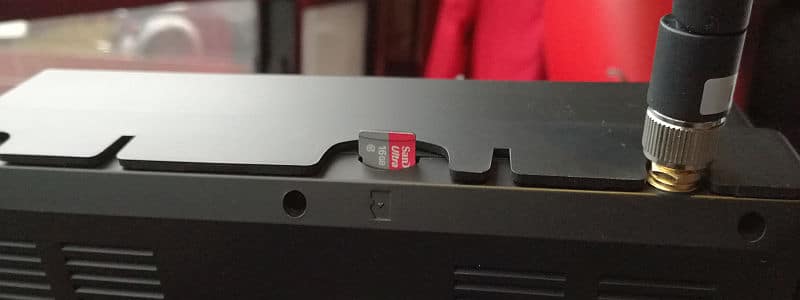
Setting it up was straightforward. Slide the card into a slot on the top of the display and navigate to the SD card format screen. Format the card and activate the recording. There is an option for continuous overwriting once the card is full.
Conclusion
This post is intended a brief look at my new Haloview backup camera and my installation. Next, I plan to put it to the test as we travel over a 1000 miles south during the next few weeks. Then I’ll be back with an extensive review of the system’s performance, all the features, plus likes and dislikes. I’ll also compare its performance against my previous Tadibrothers wireless camera system and see which I like better.
So far I have to say I’m extremely impressed with the picture quality. Hopefully, the wireless connectivity will be solid and the record function works as advertised. If so I think this system will be a winner. Cheers, Ray

Lastest Posts
-
-
Top 15 Backup Camera Mounts And Brackets May 30, 2022
-
Car Blind Spot - Everything You Need to Know Mar 11, 2022
-
Aftermarket Blind Spot Monitor Jan 4, 2022
Categories